Saturday, November 13, 2010

blueberry sour cream torte

I love tortes. LOVE them. I've had some sour cream sitting in the fridge, and I wanted to put it to good use. So when I went home last weekend, I exploited my mother's credit card to purchase frozen blueberries [hey, frozen fruit is expensive!] to make this torte.

I figured today was as good as any to go ahead and bake it; it's been one of those super lazy Saturdays, staying in [aside from my Farmer's Market run with Rudhdi this morning and getting caught up in game-day traffic], napping [or failing to do so], feeling like crap [something's going around campus these days, ugh].

Okay, so mainly I wanted to bake something to lift my spirits a bit. But hey, it worked.

Plus, it was a lovely way to end our dinner of chicken jalfrezi earlier.


Now, tortes are dense cakes made with ground nuts in place of the majority of flour used. They're fantastic because they lower the glycemic index of usually very high-GI desserts [ignore the cups of sugar that go into them...], but also because they have very nutty, crispy, rich crusts.

And everyone knows crust is the best part of any dessert.

Though, when said dessert has a filling made of 4 cups of blueberries and a creamy, tart, topping made of sour cream, it's a pretty close call.

Blueberry Sour Cream Torte
Recipe adapted from Dana Treat

For the crust, you'll need:

  • 1 cup whole wheat flour
  • 1/2 cup almond meal
  • 2/3 cup ground almonds
  • 1/2 cup sugar
  • 1 1/2 tsp baking powder
  • 1/2 tsp salt
  • 1 stick butter, somewhat softened, but not warm

For the blueberry filling, you'll need:
  • 4 cups fresh blueberries [or thawed if frozen]
  • 1/2 cup sugar
  • 1 tsp lemon juice
  • zest of one lemon
  • 1/2 tsp ground cinnamon
  • 1/4 cup cornstarch

For the sour cream topping, you'll need:
  • 2 cups sour cream
  • 2 egg yolks
  • 1/2 cup sugar
  • 1 tsp vanilla

Preheat oven to 400 degrees Fahrenheit. Grease a 9-inch springform pan and line the bottom with parchment paper.

For crust: combine flour, almond meal, ground almonds, sugar, baking powder, and salt in the bowl of an electric mixer with the paddle attachment on medium-low speed. Add in butter and increase speed to medium. Combine until dough becomes crumbly and starts to come together. Pour crust into the prepared pan and press evenly over the bottom. Bake for 10-15 minutes, until crust is golden. Remove from oven and let cool. Reduce oven temperature to 350 degrees as the rest of the torte is assembled.

For filling: in a medium saucepan, combine all filling ingredients. Cook over a medium flame for 3-5 minutes, stirring gently, until blueberries start to bubble and burst. Reduce heat to low and simmer for 3 minutes. Set aside to cool slightly.

For topping: In a medium bowl, combine all topping ingredients. Mix until well blended.


Pour filling on top of crust and spread evenly. Pour topping on top of filling and smooth gently with a rubber spatula, without mixing the topping into the filling itself. Bake torte for 45 minutes. Set torte on a wire rack and let cool completely before unsnapping the sides and removing the torte from the pan. Refrigerate until ready to serve.

To be completely honest, I was terrified that this was going to fall apart. I thought the cornstarch wouldn't effectively hold the blueberries together and there would be some fruit spillage of epic proportions.

Not so. It helps that I waited a good two hours while the torte cooled in the fridge before I removed it from the pan and cut it. And it was well worth the wait, because the layers were perfect! The topping didn't even sink into the blueberry layer!

When Noosh and I each took a bite of the torte, we had mixed feelings. It didn't taste quite like I expected it to. I was anticipating some major blueberry flavor. Don't get me wrong, there is a TON of blueberry in it, but the topping really shines through, in a very good way. Plus, the crust is phenomenal.


Oh, mom would be proud. Or irritated.

Seeing as when I told her about the torte, all she texted me was that I'm "focusing more on my culinary skills than on studies." Which is not true!

...and even if it was [which it isn't], cooking is a much better life skill than symbolic logic will ever be.

Ever.

Thursday, November 11, 2010

homemade oreos with peanut butter filling

I woke up earlier than I needed to this morning. Of course, I tried going back to sleep, but it didn't work. It rarely does for me anyway. So then I figured there were two things I could do:

1) Get on Facebook and waste the extra 40 minutes of morning time I had stalking/creeping on people I don't really care about at all [nor vice-versa].
2) Bake.

I decided to go with the latter. Also as a kind of test to see if I could actually successfully bake something and not miss the bus to grounds.


Bam. AND I DIDN'T MISS THE BUS.
It was quite the successful morning.

Homemade Oreos with peanut butter filling. I baked these for my dear friend Zach, who celebrated his 20th birthday this past Tuesday. Earlier tonight one of his good friends threw him a surprise party, and since he'll be out of town all weekend on some silly XC shenanigans, I figured I'd whip these together to give him today. Though Noosh did sandwich them for me while I was in class, which was a tremendous help.

Since he's a big fan of the chocolate and peanut butter combination [and I mean, come on, who isn't?], I decided to go with the Oreo. [I also recall many a late-night calc II study session in which we devoured (read: emotional eating) packs of Oreos, so it had to be done.]


Homemade Oreos with Peanut Butter Filling

For the Oreos, you'll need:
  • 1 1/4 cups flour
  • 1/2 cup unsweetened Dutch process cocoa
  • 1 tsp baking soda
  • 1/4 tsp baking powder
  • 1/4 tsp salt
  • 1 1/4 cups granulated sugar
  • 1 1/4 sticks unsalted butter, at room temperature
  • 1 egg

For the filling, you'll need:
  • 1 cup confectioner's sugar
  • 1 cup smooth peanut butter
  • 5 tbsp butter, at room temperature
  • 1 tsp vanilla
  • 1/4 tsp salt
  • 1/3 cup whole milk

Preheat oven to 375 degrees Fahrenheit. Line a baking sheet with parchment paper.

In the bowl of an electric mixer, use the paddle attachment on low speed to combine flour, cocoa, baking powder, baking soda, salt, and sugar. Still on low speed, add in butter and eggs. Continue mixing until dough comes together in a mass.

Using your hands, roll up small balls of dough, about 1-inch in diameter, and place them about 2 inches apart on the baking sheet. With the palm of your hand, evenly press down on the dough to form discs. Bake for 11 minutes. Allow cookies to cool on a wire rack.

To make the filling, combine powdered sugar, peanut butter, salt, vanilla, and butter in the bowl of an electric mixer using the paddle attachment. Mix at low speed until creamy. Slowly pour in milk. Increase speed to medium-high and beat until mixture is smooth.

Once cookies have cooled completely, frost the flat side [underside] of one cookie with a generous amount of filling and gently sandwich it with a cookie of roughly the same size. Cookies stay fresh at room temperature in an airtight container for up to 5 days.


Man. These were good. Like, surprisingly good. Especially the filling.

It's good that I had to give them all away.

All but the two that I ate.

But nevertheless. Things would be much worse if I still had the plate sitting in front of me.


Omnomnom.

In other news, ONLY ONE WEEK UNTIL HARRY POTTER AND THE DEATHLY HALLOWS PART ONE.

It's going to be hard to contain my excitement in the next seven days. 

Sunday, November 7, 2010

pumpkin scones with brown sugar glaze

So, remember when I talked about going to Alice's Tea Cup when I went to New York to visit Nimra? Probably not. But anyway, since I am far too obsessed with baking for my own good, I immediately had to buy the cookbook they just released on the 25th of October. It came in the mail on Thursday, signed [picture me grinning from ear to ear like a fangirl when I saw how two pastry chefs signed my cookbook. yeah, that pathetic], and I was almost late to class because I was skimming through it and admiring all of the colorful photos.

I brought it with me when I came home for the weekend, and decided that I had to try baking some of their famous pumpkin scones with brown sugar glaze. It was, fittingly, the first [and currently, only] thing I ate there when I went with Nimra, and it was divine. Ergo, I ran to the grocery store yesterday to pick up some canned pumpkin and buttermilk, much to mom's dismay, and as soon as I woke up this morning got to work baking.


Pumpkin Scones with Brown Sugar Glaze

For the scones, you'll need:
  • 3 cups all-purpose flour
  • 1/3 cup sugar
  • 1/8 cup cinnamon
  • 1/2 tsp salt
  • 1 tbsp ground ginger
  • 1 1/2 sticks unsalted butter
  • 1 1/4 cups buttermilk
  • 1 cup canned pumpkin [NOT pumpkin pie filling]
  • 1 tsp vanilla 

For the glaze, you'll need:
  • 2 sticks unsalted butter
  • 1 cup packed brown sugar
  • 1 tsp lemon juice
  • 1/4 tsp salt
  • 1/2 cup heavy cream

Preheat oven to 425 degrees Fahrenheit and grease and flour a large baking sheet. 

In a large mixing bowl, combine flour, sugar, cinnamon, and ginger, and mix at low speed with paddle attachment until well combined. Add in butter, increase speed to medium, and beat until dough has the consistency of breadcrumbs. Using your hands, make a well in the center of the dough. Pour pumpkin, vanilla, and buttermilk into the well. With your hands, mix until dough is wet. It will also be quite sticky.

Roll dough out onto a floured surface and pat down with your hands until it is about 1 1/2-inches thick. Using a 3.5-inch pastry cutter, cut out scones and distribute them evenly on the baking sheet. Bake for 12-15 minutes until golden brown and springy to the touch. Let cool for at least 20 minutes before dipping in the glaze.


To prepare the glaze, put butter, sugar, lemon, and salt in a medium-sized saucepan over medium-high heat. Whisk as butter melts and sugar dissolves to make sure the syrup is uniform. When the syrup comes to a boil, slowly pour in the heavy cream. Lower heat and continue whisking for 2-3 minutes until glaze starts to thicken. It should coat the back of a spoon. Remove from heat and let stand for 5 minutes. If serving immediately, dip the top of the scones into the warm glaze. If not, do not dip the scones; pour glaze into a container and only drizzle or dip the scones in the glaze when ready to serve.


Mom had absolutely no faith in my scone-making ability. She watched me make the dough and told me to just give up and start over, because the dough was 'too sticky' for them to turn out well. Seriously, it was just chastisement after chastisement. Even when they were in the oven, she told me to go check on the 'impending failures.' Though, I have to admit, even I was worried; I wasn't sure how they were going to turn out because the dough did seem much wetter and stickier than I had anticipated.

Still, I persevered, and it was well-worth the uncertainty, because they turned out perfect. 

In fact, Yusra couldn't contain herself and ate two. I myself ate one and a half, they were so irresistible. Even mom had to admit, they were delicious, and I noticed she kept going back to the kitchen to nibble. [HA, mom].

 
Now Yusra wants me to make them on Thanksgiving. Maybe I will, as a sort of pregame for the main event. Which I'm still told is going to be my responsibility.

Oh, the pressure.


sour cream coffee cake

I'm home for the weekend! Haven't been home for about a month now, and after 2 insanely busy and mildly stressful weeks, I decided it was time for a much-needed weekend back home.

Also, dad's birthday is on Tuesday. Not that he really does much for his birthday, but I wanted to see him for it. Interestingly, my dad's tastes in foods are pretty much the exact opposite of mine. As in, he doesn't care much about it at all. He likes a few time-tested dishes and isn't one for experimenting with new foods and flavors. Consequently, we don't have big dinners or anything for his birthday, because his idea of a good time is eating one of his 'acceptable' meals and watching some terrible action movie.

But he does love one particular cake; Ina Garten's delicious, moist, perfect, sour cream coffee cake. So it was only appropriate that I bake it while I'm home this weekend so he can have it with his morning tea before work. An early 'birthday present,' if you will.

[also, I'm broke and this is the best that I can do.]

I also love this cake. It always turns out spectacularly. Plus, I always trust in Ina Garten's dessert recipes.

Sour Cream Coffee Cake

For the cake, you'll need:
  • 1 1/2 sticks unsalted butter, at room temperature
  • 1 1/2 cups granulated sugar
  • 3 eggs
  • 1 1/2 tsps vanilla
  • 1 1/4 cups sour cream
  • 2 1/2 cups all-purpose flour
  • 2 tsps baking powder
  • 1/2 tsp baking soda
  • 1/2 tsp salt

For the streusel, you'll need:
  • 1/4 cup packed light brown sugar
  • 1/2 cup all-purpose flour
  • 1 1/2 tsps ground cinnamon
  • 1/4 tsp salt
  • 3 tbsp cold, unsalted butter, cut into cubes
  • 3/4 cups chopped walnuts or pecans, optional

For the glaze, you'll need:
  • 1 cup confectioner's sugar
  • 2 tbsp maple syrup

Preheat oven to 350 degrees Fahrenheit. Grease and flour a 10-inch tube pan.

Cream the butter and sugar in the bowl of an electric mixer with the paddle attachment on medium speed until light and fluffy, 4-5 minutes. Add eggs, one at a time, and then mix in vanilla and sour cream. In a separate bowl, sift flour, baking powder, baking soda, and salt. Add dry ingredients to wet mixture on low speed, or fold with a rubber spatula, until just combined.

For the streusel, combine brown sugar, flour, cinnamon, and salt until evenly mixed. Using your hands, pinch butter into the dry mixture until it forms a crumble. Add in the nuts, if desired.

Pour half the cake batter into the tube pan and spread it evenly. Sprinkle half of the streusel evenly over the batter. Top with the remaining batter, spreading evenly, and sprinkle the remaining streusel. Bake for 50-60 minutes, until a toothpick comes out clean.

To prepare glaze, sift powdered sugar into a medium bowl. Pour in maple syrup and stir vigorously until mixture has thinned. If too thin, add more sugar; if too thick, add some water. 

Let cake cool for at least 10 minutes before removing from the pan. Run a butter knife around the edges of the pan to gently loosen it. Cool the cake on a wire rack for at least 30 minutes [preferably until completely cooled], before drizzling glaze on top.

It takes every ounce of restraint for me not to pick off the streusel topping while the cake is cooling. And when you cut into it, there's a gorgeous streusel ribbon in the center. Plus, the sour cream makes the cake super moist and not too sweet.

It's the perfect coffee cake recipe. I've literally made this dozens of times, and each time I feel like it gets better and better. Not because my skills are improving much, but more because this cake just tastes amazing, and it never grows old with time.

Though, I made this yesterday, and I woke up this morning and about half of it was gone. I don't think there will be any left by his birthday on Tuesday.

Ironic.

Tuesday, November 2, 2010

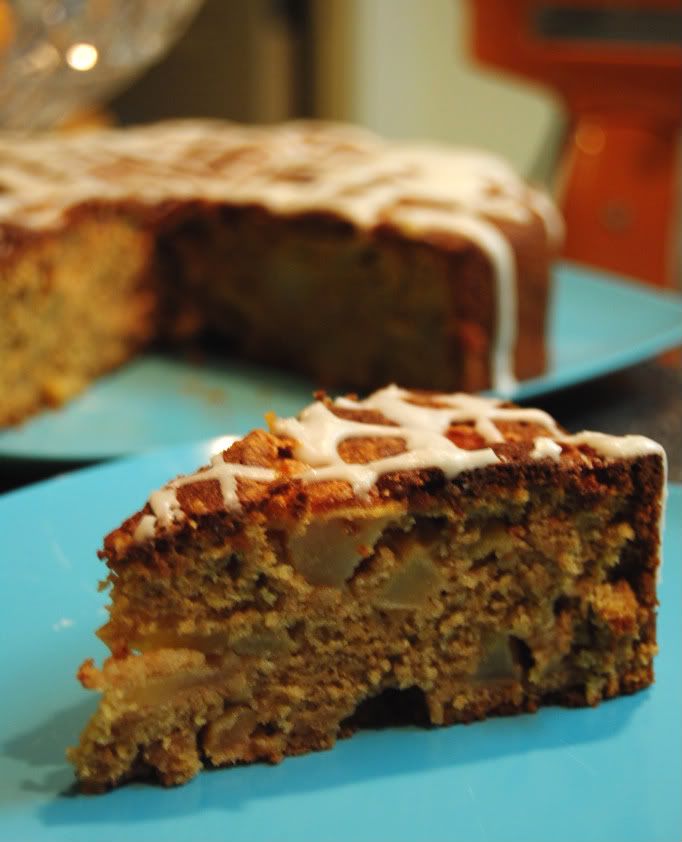
apple cake with lemon glaze

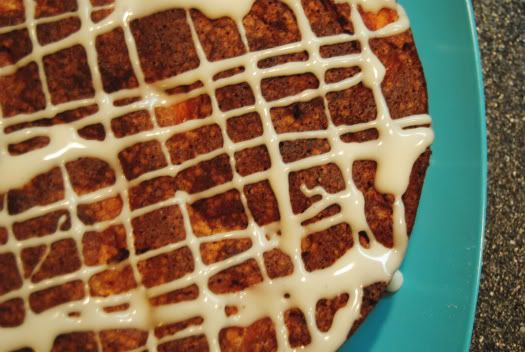
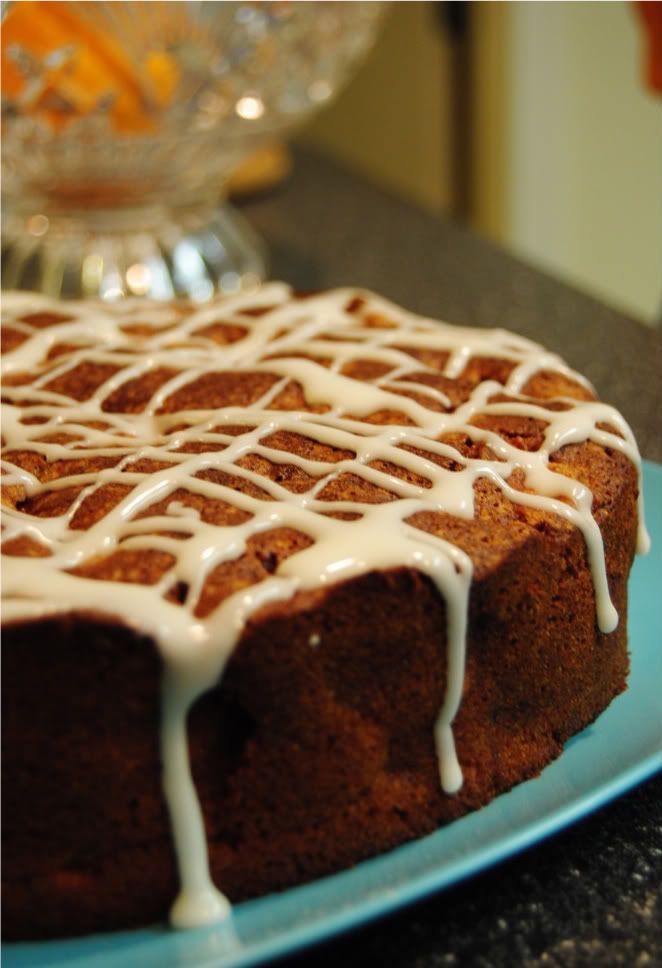
Today I took a break from exam studying to bake an apple cake! Which I'd been meaning to do for a while now.

Not to mention it tasted like autumn in cake form.


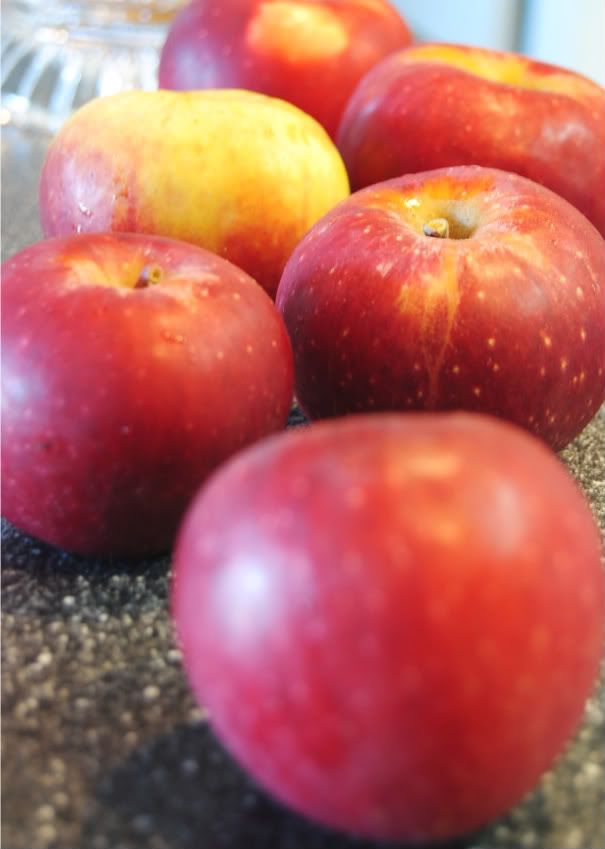
A few weeks ago, a group of friends and I went up to Carter Mountain Orchard to pick apples, and I picked a fair amount of Winesaps to use for baking.

mmmm...apples...
Finally put them to good use! I found a wonderful recipe at soupbelly for an apple cake with lemon glaze [although, I ended up making a lime glaze because we only had lime juice on hand, but I'm sure the lemon would have given it an extra kick].

Apple Cake with Lemon Glaze

For the cake, you'll need:
  • 2 eggs
  • 1 cup vegetable oil [or substitute for 1/2 cup unsweetened applesauce for a healthier alternative] 
  • 1 cup granulated sugar
  • 1 cup brown sugar
  • 2 tsp vanilla
  • 2 cups wheat flour
  • 1 tsp baking soda
  • 1/2 tsp salt
  • 2 tsp cinnamon
  • 1/4 tsp nutmeg
  • 4 cups apples, peeled and cut into small cubes

For the glaze, you'll need:
  • 1 cup confectioner's sugar
  • 1/2 tbsp lemon juice [add more or less for desired consistency]
  • 1/2 tsp lemon zest

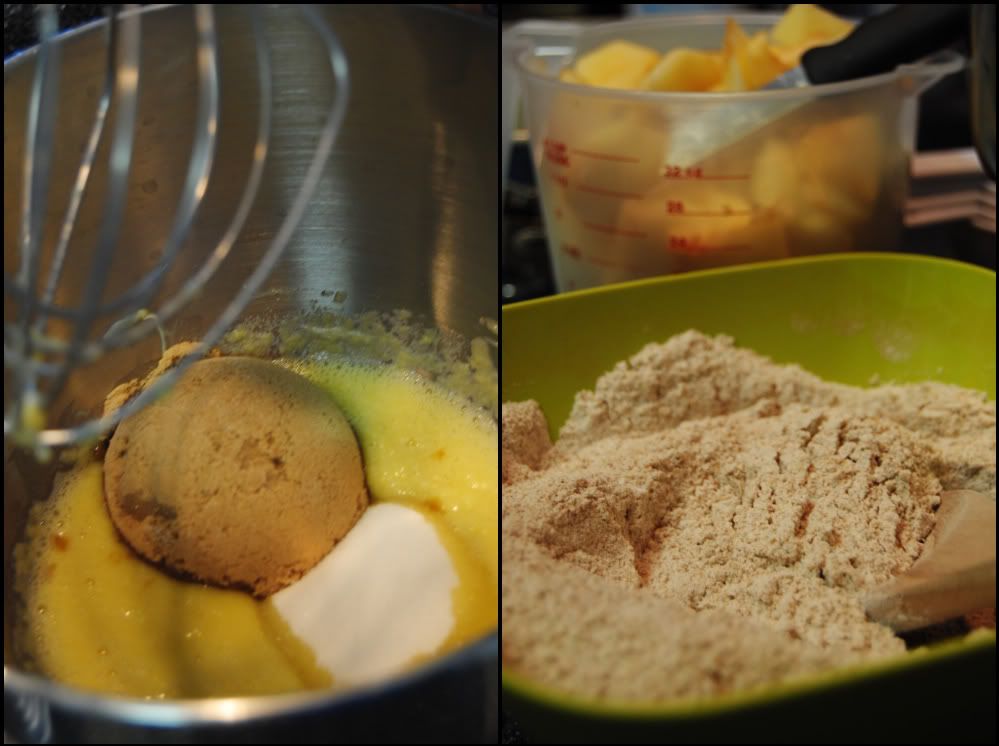
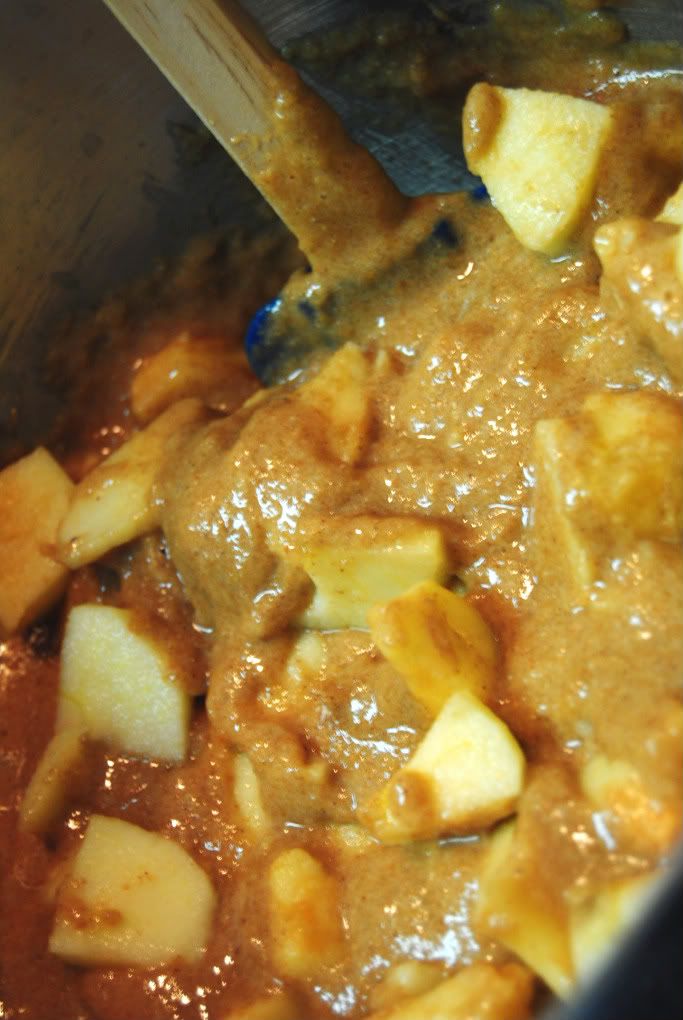
Preheat oven to 350 degrees Fahrenheit and grease a 9-inch springform pan. In the bowl of an electric mixer, whisk together eggs and oil [or applesauce if using substitution]. Add granulated and brown sugars and vanilla and whisk until blended. In a separate bowl, combine flour, baking soda, salt, cinnamon, and nutmeg. Add flour mixture to egg and sugar mixture and fold until incorporated. Batter will be relatively thick. Fold in apples.


Pour batter into pan and level it evenly. Bake for 70-75 minutes. Let cool completely before pouring glaze on top.


To make glaze, sift confectioner's sugar. Pour in lemon juice and mix until sugar has dissolved. Add more lemon juice for thinner glaze; add more confectioner's sugar for thicker glaze. Once cake has completely cooled, use a spoon to drizzle glaze over top.


I let the cake cool while I went to take my exam, and I had actually forgotten about it until I walked in and smelled the cinnamon and apple. Talk about a pleasant surprise! Made the glaze and drizzled it before I had dinner, then cut a slice for Noosh and myself. Yum.

And not even that bad for you! Whole wheat flour, applesauce instead of oil; it's practically a health food, really.

Right?

Don't answer that.

In other news, I can't believe it's almost Thanksgiving. Which is, incidentally, my favorite holiday.

Well, I like the entire current holiday season. But Thanksgiving is in a league of its own, with all its gastronomic prowess.

And mom gave me the 'honor' of cooking our entire Thanksgiving dinner, meaning she's either giving me a false sense of culinary self-worth before telling me she already has dinner planned out, or she plans on watching me make a fool out of myself in the kitchen. I'll probably destroy the turkey/light something on fire and run to her for advice/grovel at her feet for help, but until then, the thought of cooking dinner is keeping me happy.

Plus, it'll be nice to be home for a bit.