Showing posts with label dessert. Show all posts

Monday, September 5, 2011

2. india: gulab jamun

I've always been fascinated with India. It's an enormous country and Pakistan's neighbor, so it's a wonder I haven't been before [taking into consideration the political and religious context of the two countries, it's not really surprising, but from a purely geographical standpoint, somewhat so]. When one thinks of India, one typically thinks spices, the Taj Mahal, bright festivals and Bollywood, large families and sweltering heat, monsoons and mangoes, and a multitude of incredible food.

Having never been, I have the same idea in my mind. And I'm sure even when I am to visit, it'll be pretty accurate. But I also know there's more to a country so large than just what you'd glean from a superficial trip. Richness in people, history, culture, all unique throughout the vast expanse of the peninsula, makes for one rather diverse place. One that I don't think any outsider will ever really come to understand. One that I don't think many Indians themselves ever really come to understand.


Still, I do know that Indian food is my favorite type of cuisine in all the world. Of course, the amount of food from India that I haven't eaten is enormous, since so much Indian cuisine is itself regional, but I'd never, ever, pass up a good masala dosa or samosa or palak paneer or tandoori chicken.

But even more so than the meats and veggies, the mithai. Luckily for me, although I'll never find masala dosa in Karachi, India and Pakistan share a lot of the same dessert. Mango lassis, kulfi, jalebi, laddu, to name a few. Sugar syrups, sticky fingers, cold ice creams, the familiar tastes of pistachio, mango, almond, saffron, and rose water. These are the tastes I grew up with, visiting Pakistan in my youth with nothing but Heidi under my arm and a sweet tooth large enough to take down empires.

[You'd think that two countries with such impeccable taste in food would be able to set aside their differences over a some malai kofta, a towering plate of naan, a steaming bowl of chicken chettinadu, and cold glass of lassi. Nevertheless, I'm optimistic about the future.]


And yet, to this day, nothing quite beats gulab jamun.


I have literally never met a soul on earth who does not love gulab jamun. And if I have, the sole reason is that they've never tried it. But I mean, let's be real: you can't really go wrong with little balls of dough [carbohyadrates!], deep fried in hot oil [fats!], and left to soak in cardamom-infused sugar syrup [more carbohydrates!]. You just can't.

These gorgeous photos come from Matt, who had the incredible opportunity to spend 10 weeks in India this past summer. Safe to say, he's now more fluent in Hindi/Urdu than myself.

Mom and I have been working on this recipe for, literally, years now, and eventually, we've perfected it. Unfortunately for you all, though, it's not one that I'm going to be sharing - it's kind of like our little secret. You know, like that apple spice cake your grandmother learned from her grandmother and consequently taught your mother, and it's so absolutely amazing that when you make it for friends and they ask you for the recipe, you shake your head in mock-sadness and tell them it's not for sharing? Same situation here. So, my apologies, but this one's not for sharing!

I actually prepared these to take to Jesse's goodbye party this past weekend. She'll be heading off to Tunisia for the academic year, and is absolutely in love with these things, so obviously the natural course of action was to make her some as a little goodbye present. Luckily, she loved them, and so did everyone else, and so it was quite the success.


In retrospect, it was only natural that my second journey around the world would bring me to this beautiful country. One day, I hope to visit it myself. If not to experience the richness of its people, culture, and history, then at least for its mithai shops.

I think that's pretty good motivation in and of itself.

Wednesday, August 31, 2011

[one year ends and a journey begins] seviyan

“Great restaurants are, of course, nothing but mouth-brothels. There is no point in going to them if one intends to keep one’s belt buckled.”
- Frederic Raphael


If you've ever read this thing before, you'll know that I have an obsession with food. A rather obvious obsession with food. That's why I started this thing, really: to publicize my gastronomic antics in an outlet much preferable to texting friends miles away about a phenomenal slice of cake eaten at such-and-such restaurant, or sending camera-phone photos to my mother every time I bake something new and enthralling.

Granted, I still do occasionally resort to the texting method aforementioned, to friends who'd appreciate those antics without raising an eyebrow too high in question, if I've eaten something particularly delicious. It's just a love that should be shared, I think.

Anyway, that was 1 year ago. Exactly 365 days. 365 days since I first signed onto blogger and made this silly old thing. But it's grown to be more than just a silly old thing.

Still silly, of course, but more meaningful to me than I originally thought it'd be. Perhaps in my subconscious mind, it's a vain attempt at self-preservation. Perhaps it's a method of escaping from the trivialties of the day-to-day to a place where I don't feel obligated to do anything, really, and can stop thinking about the stresses of university. Perhaps it's because it's become way to learn, not only about baking and photography, but about life and about myself.


Or perhaps I just really, really, really like food.


No matter the reason, I'm happy to be here. I thought I'd keep this up for a few weeks, a few months at most, but it's become bigger than that. It's become a source of comfort, something I know will always be here for me to come to when I want to stop thinking. Something to remember things by, from vibrant photographs of blackberry flaugnarde to the lingering taste of apple pie on the tongue. Something that makes me appreciate Farmer's Market tomatoes and coffee dates with friends, espresso and lemon pound cake on the table.

I'm just...happy to be here, honestly. Not much more to say than that.

Aside from thank you, to you wonderful people. You wonderful people who read this silly old thing. And put up with my antics. And hopefully walk away with something afterward. A way to pass time in a dull lecture, a growling stomach, a new recipe, or maybe even a new perspective on something as ordinarily beautiful as food.

But enough of the sap. Cheese is for eating, after all. [shutup Sabeen]


Not only is today the 1-year anniversary of this blog, but it also happens to be Eid. So, obviously, as if I weren't already going to bake something in celebration, I knew it had to be something special. And so I decided to take a drive home for a bit, spend some time with mom, reminisce about Eids past [back when I could actually be home to celebrate], and cook some seviyan.

I really just love this stuff. Could eat it by the pot. Easily. I won't even notice how much of it I've eaten until there's none left, and then all I feel regrettable about is the fact that there was hardly enough for me. I've been downing this stuff since I was born, basically, and it's one of my all-time favorite sweet treats. Still, it's something mom only makes on special occasions, so when I was home this weekend for an early Eid celebration, I knew I wanted her to finally teach me the trade.

Granted, a lot of the weekend was spent cursing Irene for a loss of electricity, but therein lies the beauty of gas stoves.

Interestingly, mom says that a Pakistani woman is only considered of marriageable material if she can cook a good pot of seviyan. Wondering if I should be proud of myself for successfully accomplishing this supposed feat, or terrified of being married off in the near future.

Seviyan
Adapted from mom's recipe book

You'll need:

  • half a gallon of whole milk
  • 1 cup crushed vermicelli noodles
  • 1 14-oz can sweetened condensed milk
  • a pinch of ground cardamom
  • 1 drop of kevra, if available [alternatively, 1 drop of rosewater works as well]
  • chopped pistachios or almonds to garnish

In a large saucepan over medium flame, heat milk until just boiling. Lower the temperature to a gentle simmer. Stir in the crushed vermicelli noodles and stir. Keep stirring at a simmer for 40-50 minutes, until milk has thickened some. No need to stir continuously, but return frequently [every 5-10 minutes] as to make sure milk isn't boiling or burning. Be vigilant about scraping the sides and bottom of the pan.

After milk has thickened a bit, add in sweetened condensed milk and combine. Finally, add in kevra [or rosewater] and ground cardamom. Stir for another 5-10 minutes, to allow the sugar in the condensed milk to thicken the pudding further. Remove the pan from the heat and let rest for 5 minutes. Spoon pudding into serving dishes and top with ground nuts of choice. Be sure to do so before the skin forms on top of the pudding [which, by the way, is the best part]. Let pudding cool to room temperature, at least, before serving. Pudding tastes best after a few hours in the fridge, and will stay good, covered, for up to 5 days.


And now, this recipe leads me to my big blog project for the year [Two years? Three years? Deadlines have yet to been set, saying how it's unlikely they're to be met. But I digress].

So, I like to bake. Obviously. But more than that, I like trying new things. It's why I joined the Daring Bakers back in January; it gave me an excuse to bake things that I normally wouldn't have a reason to.

And now that this is the end of one year, and the beginning of another, I thought, "what better way to keep myself entertained during my third/fourth/post-grad year of college than to impose some sort of unreachable culinary goal that will inevitably leave me wondering why I've decided to undertake the challenge in the first place?"

Thus, I dub today the commencement of my blog project, Around the World in 50 Sweets. What am I going to do, you might ask? And did I really need to select such a corny title? Well, I am going to take a culinary tour around the world, starting in South Asia and the Middle East, traveling east through Asia and the Pacific Islands, Down Under, across the sea to South America, up north through Central America and the Caribbean to the good old' US of A, a short trip up to Canada, a boat ride across the Atlantic to Africa, a scenic backpacking trip through Europe, and finally through the Chunnel to the glorious United Kingdom. Fifty desserts to give myself and you all a taste of our world, one both enormously large and strikingly small, full of fantastic people with fantastic recipes to match. All with nothing but a whisk, mixing bowl, and a bag of sugar by side.

[Okay, so I'll have some flour and almond extract from time to time, but the above sounded more poetic. And yes, the title is staying.]


Is this crazy? Probably. Is this going to but an enormous dent in my bank account? Most certainly. Am I actually going to finish this by the end of my third year, as was my original vision? Hugely unlikely. Am I going to end up regretting this?

...well, that goes without saying. Mostly for my thighs. But at least the journey will be fun.


And so, I bring to you today journey number one, the place where my story begins, all told through a bowl of seviyan: Pakistan. Jasmine trees, Great Illustrated Classics, henna tattoos, calls to prayer, grandmothers and grandfathers, noisy rikshas, dusty streets, afternoon ceiling fans and hot summer nights. A homage to my parents. Childhood familiarity. My beginning.


A good place to start, I think.

Sunday, February 27, 2011

{DBC} vanilla panna cotta with balsamic strawberry compote

...is it time to go to Spain yet?

[hello midterm season goodbye social life]

Another Daring Baker's Challenge! I can't believe it's already been a month since the last one. Admittedly, I was nervous about it, particularly since both this and the previous one lie in the realm of mousse-like custards, and I wasn't totally satisfied with the last one. This time, though, we're taking a trip to one of my favorite countries, Italia.


Panna cotta, originally from the northern region of Piemonte, is a custard-like dessert of milk, cream, sugar, and gelatin. When chilled, the gelatin causes the custard to set into the shape of whatever bowl it's poured into, and thus can be turned over onto a plate or served as is in the bowl. Often, panna cotta is eaten with berries, fruit coulis, or any sort of of dessert sauce.

Gah, just hearing the name makes me want to hop on a plane and go back to Italy.


For this month's DBC, we had to prepare a panna cotta of some sort with Florentine cookies [the recipe for which I will post up separately]. I decided to go with a classic vanilla panna cotta topped with a tart, balsamic strawberry compote. I prepared the panna cotta on Friday, allowed it to set in the refrigerator overnight, and had Tommy over [as always!] on Saturday to help with the compote and the Florentine cookies.

The panna cotta recipe given for the challenge used 3 parts heavy cream and 1 part whole milk, but I didn't have enough whole milk on hand so substituted with 1 part half and half. The given recipe also used a combination of honey and granulated sugar, but I wanted to cut the sweetness a bit so used only granulated sugar. It's a pretty versatile dish, though, so feel free to play around with it. Just make sure to keep the appropriate ratios in mind!


Vanilla Panna Cotta
Adapted from epicurious

You'll need:
  • 1/4 cup cold water
  • .25 oz [about 2.5 tsp] unflavored gelatin powder
  • 2 cups whipping cream
  • 1 cup half & half
  • 2/3 cup sugar
  • 1 1/2 tsp vanilla

Pour 1/4 cup cold water into a small bowl. Sprinkle gelatin over top of water and let stand for about 15 minutes, until the gelatin softens. Heat water in the microwave in 15-second intervals until gelatin dissolves. Set aside.

Combine whipping cream and sugar in a medium saucepan over medium heat, stirring until the sugar dissolves. Remove pan from the heat and stir in vanilla and gelatin. Divide custard mixture into ramekins. Cover tightly with plastic wrap and chill until set, at least 6 hours and up to one day.

To unmold panna cotta, dip ramekin in a bowl of hot water for about 20 seconds. Invert ramekin onto a serving plate, gently shaking and tapping the sides of the ramekin to loosen the panna cotta. Top with desired sauce and serve immediately.
However, panna cotta can be served in ramekins without unmolding. Just top with desired sauce before serving.


Balsamic Strawberry Compote
Adapted from savory sweet life

You'll need:
  • 1 pound [about 2 cups] chopped strawberries
  • 2 tbsp sugar
  • 1 1/2 tbsp balsamic vinegar

In a medium saucepan over medium heat, cook strawberries, sugar, and balsamic vinegar for about 10 minutes. The sauce is done when it can coat the back of a spoon. Remove from heat. Let cool to room temperature before pouring on the panna cotta.

we had a pretty epic feast this afternoon.
The consistency of the panna cotta is beautiful: silky smooth and bursting with vanilla flavor. The compote is also a delicious contrast; the acidity of the balsamic strawberries plays off the delicacy of the panna cotta well. I checked out some of the other bakers' desserts and they are absolutely stunning! Mine leave much to be desired in comparison, but the others have given me inspiration. Be sure to creep on tastespotting and foodgawker in the upcoming few days, as I'm sure each will be flooded with images of some gorgeous panna cotta.

In other news, a combination of watching Tangled for the fifth time and finishing ACII has left me in a very Italian mood. Not that the former really took place in Italy, but the kingdom dance always makes me feel as though I'm perusing Sicily. Plus, all the snippets of Italian [most often cursing, but nevertheless] in ACII has made me want to retake the language.

[The cursing is unrelated here. Sort of. I can't help it that cursing sounds so much more emphatic when it's done in Italian.]

Anyway, my point is, I need to get me on a plane to Italia ASAP.


Ciò che si mangia con gusto non fa mai male.

Wednesday, February 16, 2011

coconut burfi

Sitting with my laptop outside in 60 degree weather? In the middle of February? What sorcery is this?!

...I'll take it.


I've been basking in the glory that is the sun for the past few days. A welcome change after frigidly cold January weather. Reading Bécquer for lit courses, being distracted by birds whilst in philosophy, drinking iced coffees in between classes without feeling like an idiot for ordering an iced coffee in the middle of winter; it's all so poetic. Or perhaps I've been reading too much post-romantic Spanish literature.

In any case, the main point is that I love this weather. I love being able to enjoy my ten-minute walk to work without my hands numbing over to the point where I can't even tell if they're still attached to my wrists. I love being able to sit outside during my one-hour break between classes instead of wishing ill upon every person who opens the door to Starbucks and lets the draft in. I love not having to borrow friends' sweatshirts [and failing to return them in a timely fashion...sorry, Matt] because of being absurdly under-dressed for the chill.

I am extremely cold-sensitive, in case you were wondering.

Luckily, Cville has been blessed with gorgeous weather this week. And how better to enjoy the weather than by doing something charitable?


Tomorrow evening, the MSA is hosting a Pakistani Cultural Bazaar to raise money to help rebuild the lives of the flood victims. I knew I wanted to help out as best as I could, so I offered to make something of the food variety. [Will also potentially be providing my services as a henna tattoo artist if need be, but that has yet to be solidified.] Anyway, at first I wasn't quite sure what to make. Cookies? Brownies? Cake balls? Oreo truffles? ...nah.

This is a cultural event, after all. A time to appreciate, what for most people are, foreign customs and values, to think of those who are severely under-assisted and need our help and support, and be unified by shared compassion and humanity. I wanted to make something that showcases the FOB within me, that will bring a little bit of Pakistan to everyone who attends. And that can only mean one thing:

Mithai. Specifically, coconut burfi.


Burfi is one of my favorite Pakistani desserts. Plain burfi is basically condensed milk cooked over medium heat with sugar until it solidifies into a dough. The dough is poured into a pan and left to set, then cut into small pieces and devoured. Burfi comes in a variety of flavors, and can be prepared with fruit [usually mango or coconut], spices like cardamom, or nut flours [almonds or pistachios]. I will never in my life be able to replicate the burfi my uncles buy for me from the mithai shops in Karachi, which is probably be a good thing because I can eat that burfi by the pound, but nevertheless, I can attempt.

Mom made these for the Eid party we threw back in the fall, and since then I've been pestering her for the recipe. She graciously [read: finally] obliged my request, and showed me how to make them when I went home last weekend. The recipe is, to my surprise, extremely easy, and extremely quick. Cook time is about 15 minutes total. Cool time is a bit longer, about 2 hours, but if you're like me, you'll just stick the pan in the fridge once it's cooled for like half an hour and eat it after 15 minutes of refrigeration.


 Coconut Burfi 

You'll need:
  • 1 tsp butter
  • 2 cups whole-milk ricotta cheese [never use skim or fat-free dairy when baking, unless specified; it throws off the texture]
  • 1 heaping cup of granulated sugar
  • 1 pound unsweetened coconut [note: This is not coconut flour, nor is is shredded coconut. It's as if you ran unsweetened shredded coconut through a food processor and pulverized it into a powdery crumbs. Can be purchased in any international super market.]
  • 2 drops kewra [can substitute with 2-3 drops coconut essence]
  • food coloring, as desired

Line a 9x13-inch pan with aluminum foil and set aside. In a medium, shallow pan over medium heat, melt butter. Add in ricotta and sugar, and stir until melted. Add in kewra and food coloring. Reduce heat to very low and add in coconut. Stir until coconut absorbs all the liquid, 10-15 minutes. Be sure to stir frequently to prevent coconut from burning. The coconut mixture should be firming up. Once all the liquid has been absorbed and coconut has had time to cook some, pour the dough out onto lined baking sheet. Press dough evenly across the pan and flatten out with the back of a spatula [or your palm]. Leave burfi out to cool and set, at least 45 minutes. Cut burfi into small diamonds and serve.

Burfi will stay good for 3-5 days in an airtight container. If refrigerated, will stay good for up to a week.


I suppose it's not necessary to color your burfi, but I think it gives it a unique touch. For this batch, I went with about 5 drops of green food coloring. Also, the reason I ended up using 3 pans was because I used a total of 24 oz of coconut rather than 16 [and adjusted the ratios accordingly].

What I love about this recipe is that it's not overly sweet, and the coconut is not overpowering. It's a relatively light dessert, as far as mithai goes [which is pretty much on the opposite spectrum of "light"], and very palatable for people who aren't huge coconut fanatics. I am, though, which means that I am one happy camper with this recipe.


Here's to hoping that tomorrow's Bazaar is a success!

Sunday, February 6, 2011

super bowl football truffles

Super Bowl Sunday.


Honestly? I don't care much for the Super Bowl. And it's not because I'm a girl, and I can't appreciate the game, and I don't know what's going on. On the contrary, I much enjoy watching football, and can follow it pretty well [it's not that difficult, to be honest]. But being at school, I don't have time to keep up. I actually kept up with NFL pretty well in high school [senior year is when I discovered that my father actually also watches football, so there was lots of bonding happening], but at college my interest has dwindled.

It may help that our team did atrociously my first year, and since then I haven't given the sport a second thought.

Now, I use Super Bowl Sunday as an excuse to release pent up aggression, yelling for a team that I really have no strong attachment to [particularly this year, since the Giants aren't playing], and eating copious amounts of game day foods. Chili, nachos, wings, pizza, brownies.


Well, that's a lie. Low-carbing isn't really conducive to enjoying game day foods. But we are having some friends come over in a few hours for a nice evening of potluck dinner, playing video games, and alternating between the Super Bowl and the Puppy Bowl. And even though I can't be eating them [though, let's be real, I'm going to try one], I've made some Oreo truffles for the occasion.

Maybe we'll even be able to keep our attention on more than just the first quarter with these in front of us.

[Unlikely.]

Noosh as my hand model.

Super Bowl Football Oreo Truffles
Adapted from bakerella

You'll need:
  • 1 package Oreos, or any such cream-filled chocolate cookie
  • 1 8-oz package of cream cheese, room temperature
  • 5 oz melting chocolate
  • 2 oz melting white chocolate

Cover a large baking dish with parchment paper. Using a food processor, grind Oreo cookies to fine crumbs. Mix crumbs with cream cheese. Shape dough into football-shaped balls and place parchment paper. Refrigerate for at least 45 minutes. Melt melting chocolate [if you don't have melting chocolate, melt 5 oz of chocolate chips with 1 tbsp of shortening] and dip truffles into chocolate. Place back on the parchment paper and refrigerate for an additional 30 minutes, until chocolate sets. Melt white chocolate and pour into a plastic or piping bag. Snip one corner and pipe football designs on firm truffles. Refrigerate until serving.


So cute. So easy. So yummy.

Perfect for a lazy Super Bowl Sunday afternoon.

Saturday, December 4, 2010

lemon curd

I've been known to take a spoon to lemon curd and just eat it plain.

no shame.
Over the years, I've come to appreciate [read: love with every fiber of my being] lemon curd. It's a love passed down from mom. She's actually more likely than I am to take a spoon to the stuff [in fact, she's the reason my supply seems to keep disappearing...].

Lemon curd is basically egg yolks thickened with sugar, butter, and lemon juice. As it cools, it turns a beautiful, bright yellow color, and can taste anywhere from slightly tart to full-out tangy, depending on how much lemon juice you use. [I, personally, like mine on the tangy side, because in layer cakes, the frosting is sweet enough to combat the zing from the curd].

I made this share of lemon curd for a layer cake, the recipe for which I'll post up separately.

Lemon Curd
Adapted from Alton Brown

You'll need:

  • 5 egg yolks
  • 1 cup sugar
  • 4 lemons, zested and juiced
  • 1 stick butter, chilled and cut into cubes

Juice lemons to make 1/3 cup lemon juice. If you don't have quite 1/3 cup, pour in enough water (or lemon juice, for tarter lemon curd) until you do.

In a medium saucepan over medium-high heat, whisk egg yolks and sugar. Pour lemon juice and zest into egg yolks, and continue whisking. Whisk as egg yolk mixture begins to thicken, about 8 minutes.

Remove from heat and add in butter, one cube at a time, until fully incorporated, whisking between additions. Once lemon curd is blended, pour into a container. Allow it to cool to room temperature, then cover with plastic wrap or lid. Curd keeps well in the fridge for up to 2 weeks, or in the freezer for up to 2 months.

Luckily, I've got a little bit leftover from the cake.

It's in the fridge right now.


Can't promise it'll still be there tomorrow.

Tuesday, November 23, 2010

classic chocolate eclairs

I love when friends want to bake. It's such a fun time, getting together with people, making messes, laughing at kitchen disasters, and taste-testing dessert. And I'm sure the fact that they get delicious food out of it has nothing to do with wanting to spend time with me. Nope, not at all.

Tonight, my boys [i.e. Raj, Hersh, Nathaniel] came over to bake eclairs. This whole bake date was actually all Hershil's idea, though he and I both compromised on the dessert of choice. Mainly because I've never made choux pastry before and thought it was about time to try, but also because Hershil had no idea what an eclair was.

OM. NOM.

Classic Chocolate Eclairs

For the choux pastry, you'll need:
  • 1 cup water
  • 1 stick butter
  • 2 tsp sugar
  • 1/2 tsp salt
  • 1 cup flour
  • 4 eggs

For the pastry cream, you'll need:
  • 2 cups whole milk
  • 1/2 cup sugar
  • 1 tsp vanilla
  • 6 egg yolks
  • 4 tbsp flour
  • 4 tbsp butter

For the chocolate glaze, you'll need:
  • 4 tbsp butter
  • 4 oz chocolate

To make filling: in a medium size saucepan over medium flame, heat milk. In a separate bowl, whisk egg yolks, sugar, vanilla, and flour. When the milk is steaming, pour about 3/4 cup of hot milk into the egg mixture, whisking constantly. [This is done to temper the egg yolks so they do not cook once added to the milk.] Once combined, pour the egg mixture back into the saucepan. Continue whisking. Once milk mixture comes to a boil, whisk for about 2 minutes and then remove from heat. Add in butter and whisk until well blended. The filling should have thickened. Let filling cool to room temperature before pouring into a bowl. Cover bowl with plastic wrap and refrigerate for at least one hour. [Note: pastry filling can be made up to 2 days in advance if kept in the fridge in an airtight container.]

To make choux pastry: preheat oven to 425 degrees Fahrenheit and line a baking sheet with parchment paper. In a medium saucepan over medium flame, heat water. Add the butter, sugar, and salt, and stir with a wooden spoon until butter has melted. Add flour all at once, and stir vigorously. The mixture will immediately start to thicken and pull away from the sides of the pan. Once blended, remove saucepan from heat and let cool for 4-5 minutes, stirring occasionally. Add eggs, one at a time until each is fully incorporated into the pastry dough, stirring vigorously. Spoon pastry dough into a piping bag or plastic bag with a medium-sized hole cut in the corner [or a No. 10 or larger tip for the piping bag]. Pipe pastry dough in 1x4-inch strips, with about an inch space in between. Bake for 20-25 minutes, until tops are golden brown. Let cool to room temperature before filling.

To fill eclairs, cut through the pastry with a knife, along the middle [but do not cut pastries in half]. Spoon filling into a piping bag or plastic bag and pipe a generous amount of filling into each eclair.

To prepare chocolate glaze: in a microwave or over a stove-top, melt chocolate and butter. Let cool for 1-2 minutes before drizzling over filled eclairs. Serve immediately or refrigerate. Eclairs will keep well in the fridge for up 2-3 days.


So, I picked the boys up around 7. We swung by Kroger and picked up some milk and eggs, then headed over to the apartment. I didn't initially realize that eclairs would be as long a process as they are [the filling in particular], so we made the filling and played some Catch Phrase while it was chilling. We won't even go into how embarrassing of a game that was [long story short, I for the life of me could not remember the word for 'termite', though Nathaniel and I ended up winning. Twice. Even when he thought that a body part with the word 'blade' was 'nose' instead of 'shoulder'], but it passed the time well as the pastry cream was setting.

Then we made the choux pastry. Oh man, what an adventure. Basically, it didn't occur to me to let the dough cool before adding the eggs, and I added them immediately after removing the scalding hot dough from the heat. [Never mind the fact that I remembered the need to temper the eggs before adding them to the pastry cream.] Needless to say, my poor little eggs scrambled.

Initially, Raj and Nathaniel suggested that we could salvage the situation. Not so. Scrambled eggs + pastry dough = tastes like pastry dough with scrambled eggs. So we ended up having to throw out the dough completely and restarting from scratch with the choux pastry. But, hey, baking is always an experiment. Plus, I taught Nathaniel how to separate egg whites from yolks while Raj skimmed through some of my cookbooks and Hershil ordered us some Chinese take-out.
what we demolished while the choux pastry was baking
But the choux turned out perfectly the second time around, and after another round of Catch Phrase and chitchat, we filled the eclairs and covered them in chocolate.


Oh man. These were good. I was pleasantly surprised; choux pastry is pretty difficult, and I'm not a huge fan of most pastry creams, so I wasn't expecting these to be as tasty as they were. The boys helped me fill and glaze them, and I recall leaving them to finish up while I washed dishes. And when I caught up with them, half the plate was already demolished.

But hey, at least they liked 'em!

I sent all but three home with them to share with their dorm, because the last thing I need is to be munching on eclairs during the dead of night before the last day of class.

Though I'm thinking that after Thanksgiving feast [which is back on, by the way (YES!), as I was told by mom earlier today], I'll give the baking a bit of a break. I mean, this hobby is getting both expensive and bad for my health. For rulz.

But that also means that I get to experiment with more cooking! Six pounds of chicken breasts frozen in the freezer, here I come!


In other news, there are 6 egg whites in a bowl in my fridge right now.

Guess I'm going to be eating one epic omelette for breakfast tomorrow morning.

Saturday, November 20, 2010

kheer

I love South Asian and Middle Eastern desserts. Like, LOVE. I can't even express.

Imagine the most amazing dessert you've ever eaten in your life, multiply it by a thousand, and that's almost how delicious Pakistani and Indian desserts are. Almost.

I, personally, am no expert in making such desserts. They're super time-consuming, often very easy to destroy, and very difficult to find authentic recipes outside the realm of family. But earlier this week, on Eid, I decided I had to try one. Not being home, I don't really have access to good recipes, and I don't trust Indian cookbooks for reliable dessert recipes, so I spent the week pestering my mom, via email, to jot down her amazing kheer recipe for me. Which she did, and which I was extremely excited to try.


Now, kheer is a very traditional Pak-Indian dessert made by boiling rice or broken wheat with milk and sugar, and flavored with an array of possibilities [cardamom, saffron, pistachios, almonds, to name a few]. Sounds simple, yes?

Not so.

This is a very delicate recipe, and one that requires your constant attention. For over an hour.
Believe me when I say that I pulled up a chair, plopped down next to the stove with my laptop and PSP, and kept myself entertained for 75 minutes while stirring the kheer. But it was well-worth the effort, because it turned out almost as well as mom's.


Kheer

You'll need:

  • 1/2 cup basmati rice
  • 1/2 gallon whole milk
  • 3/4 cup granulated sugar
  • 3 pods of cardamom, cracked, or a generous pinch of ground cardamom
  • 1 drop of kewra or rose water [the two are not the same, and both cannot be used]
  • 1/4 cup raisins, if desired
  • ground almonds and pistachios, to garnish, if desired

Soak rice in warm water for 30 minutes. Meanwhile, In a large pot, heat the milk on medium-high heat until warm. Drain the water, and puree the rice with about 1/4 cup of the milk in a blender. Add the pureed rice to the warm milk and increase heat as to allow the milk to come to a boil, stirring constantly to prevent rice from forming clumps. Continue stirring until milk boils, and immediately reduce heat so milk does not overflow. Allow milk to simmer for an hour, stirring every 5 minutes. Once milk has begun to thicken, add sugar. Continue stirring on and off for 5 minutes. Taste for sweetness and add more sugar if desired. Toss in cardamom and kewra or rose water, and stir until blended. Toss in raisins, if desired, and stir. Turn off heat.

To serve, use a ladle to pour kheer into bowls. Sprinkle ground almonds and pistachios on top, if desired. Kheer can be eaten either hot or cold, and keeps well in the fridge for up to 5 days.


So in my kheer, I used essence of kewra instead of rose water, though both can be found in any international market. Kewra is an extremely fragrant species of shrub with flowers that is widespread in southern Asia and is used as a perfume, aromatic oil, or fragrant distillation. Essence of kewra is also very common in many South Asian desserts. Just one drop gives the dessert an explosion of flavor. I can't imagine kheer without it, though, so it's a must-have for me. I can't describe the fragrance at all; it's unlike anything I've ever smelled, but believe me when I say that it's irreplaceable.

Luckily, the international market here in Cville sells it, as well as rose water, so now my spice cabinet is fully equipped to suit all of my Fobby needs. In fact, it may be time for a bit more kheer soon...

In other news, Thanksgiving is less than a week away and I cannot WAIT. I've got my menu totally planned out, and it's going to be epic. Mustafa, Murtaza, and Ali will be joining us, as always, so it has to impress. Not to mention Yusra will be helping me out in the kitchen, so it's going to be a ton of fun.

Mom's probably praying that our house won't burn to the ground. I'm still deciding whether or not this is a legitimate fear.

Wednesday, November 17, 2010

pumpkin pasties, straight off the hogwarts express

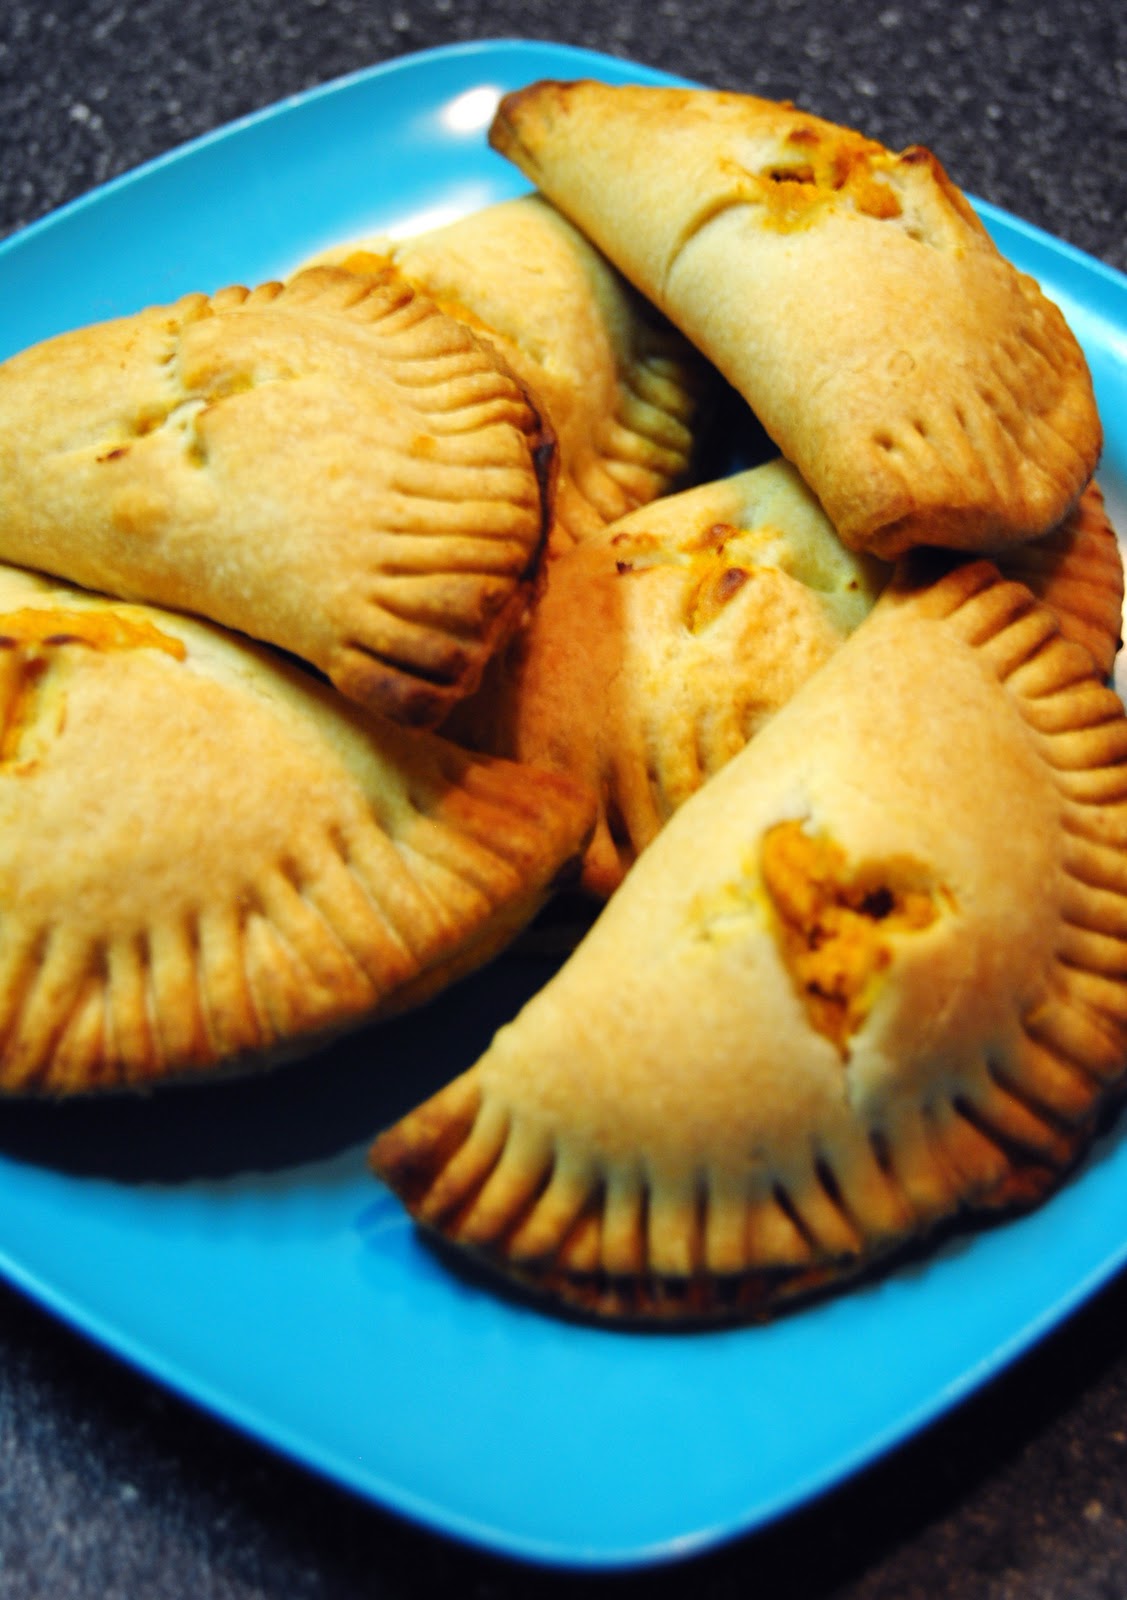
Oh yes. Authentic Pumpkin Pasties, straight from the Wizarding World.

[Oh how I wish that were the case...]


Bet you never knew that pumpkin pasties look like turnovers, did you?
[me neither]

Made these for tomorrow night's premier, along with the Peanut Butter Bonbons. Noosh and I split one of the midget ones, and oh my, they are good.

a thanks to noosh for playing paparazzi for me!

Pumpkin Pasties

For the dough, you'll need:

  • 1 1/2 cups all-purpose flour
  • 1 tbsp granulated sugar
  • 1/4 tsp salt
  • 8 tbsp cold butter, cut into pieces
  • 4 tbsp cold water

For the filling, you'll need:
  • 1 cup canned pumpkin [NOT pumpkin pie filling]
  • 1/4 cup granulated sugar
  • 1/8 tsp ground nutmeg
  • 1/2 tsp ground cinnamon
  • 4 oz cream cheese, room temperature

To make dough: on low speed, combine flour, sugar, and salt in the bowl of an electric mixer fitted with the paddle attachment. Cut in butter or add butter and beat on low-medium speed until dough has the consistency of breadcrumbs. Pour in water slowly until dough comes together. Add more water if necessary [though it shouldn't be]. Roll dough into a thick disc, cover with plastic wrap, and refrigerate for at least one hour.

For filling: on low-medium speed, beat pumpkin, sugar, nutmeg, and cinnamon until well blended. Add in cream cheese, increase speed to medium, and beat until smooth. Refrigerate until ready to bake.

Preheat oven to 400 degrees Fahrenheit. Roll dough out to 1/8-inch thickness and cut circles about 5-inches in diameter. [Note: recipe will make 6-7 pastries.] Put a little under a tablespoon of filling near the center of the circle, fold dough in half and pinch down the sides. Use a fork and make grooves to tighten the edges. Using a knife, make a small slit in the top of the dough. Bake for 30 minutes, or until pastry is golden-brown on top.


These were much tastier than I thought they'd be. I altered the original pumpkin filling recipe by adding some cream cheese [what can I say? I love me some cream cheese], and I may have overstuffed them a bit, but hey, more to love.

Though I do wish I had brushed the tops of them with an egg or butter wash so they would have glistened a bit. But in any case, they turned out to be quite a success.


It's taking every ounce of restraint not to eat one, but alas, I will save them for tomorrow. There will be just enough for Noosh, Yusra, Murtaza, Mustafa and I. Perfect.

Oh, not to mention the 28 or so Bonbons that are firming up in the fridge.


I look at these and just imagine that plump little witch on the Hogwarts Express, "Anything off the trolley dears?"

Oh man. My level of obsession is unnerving. But I'm fully okay with it.

Besides, I'm still waiting for my letter to Hogwarts.

peanut butter bulgarian bonbons

The 'Bulgarian' bit comes from Noosh. A la Goblet of Fire, of course.

I don't think I even need to talk about how Deathly Hallows Part 1 is released tomorrow night. But I will anyway.

DEATHLY HALLOWS PART 1 IS RELEASED TOMORROW NIGHT.
I CANNOT EVEN CONTAIN MY EXCITEMENT.

i'll show you mine if you show me yours

Obviously I had to celebrate in the form of edible treats. And since I so conveniently own a Harry Potter cookbook, I got straight to baking when I got home from classes this evening.

Peanut Butter [Bulgarian] Bonbons. Pretty much Buckeye Balls, but there's a hint of magic in these that you won't find in ordinary Buckeye Balls.

They were in the Harry Potter cookbook, after all.


Peanut Butter Bonbons

You'll need:
  • 1 1/2 cups smooth peanut butter
  • 1 1/2 cups confectioner's sugar
  • 1 tsp vanilla
  • 1 cup crushed graham crackers 
  • 10 oz bittersweet chocolate, melted

In a mixing bowl with paddle attachment, beat peanut butter, confectioner's sugar, and vanilla on medium speed until creamy. Pour in crushed graham crackers and mix until well combined. Line a flat surface with parchment paper. Using your hands, roll small balls of dough, about 3/4 to 1-inch in diameter, and place them on the parchment paper. Dough should form about 30 balls. Dip each of the peanut butter balls in the melted chocolate. Let the chocolate settle completely before eating. Refrigerate.


Aw man, these things are so cute. And so tasty. So much peanut butter. They are a little sticky, to be honest. And hard to keep together. But it all looks the same when you eat it, right? Right.

I'll be taking these and some pumpkin pastries to the midnight premier tomorrow. Noosh and I will be meeting up with my cousins and Yusra, as we've done for the past 6 movies.

Oh yes. Driving about 90 miles to the theater close to my parents' house, just to watch this movie.

I am that obsessed with this franchise. To be fair though, it did pretty much define my childhood. This and Pokemon, but that's besides the point.

noosh giving me a hand with the bonbons [pun intended]

Oh man. 12 hours and 35 minutes until the premier. I don't know if I'll be able to sleep tonight.

Nooooot exaggerating.

Saturday, October 23, 2010

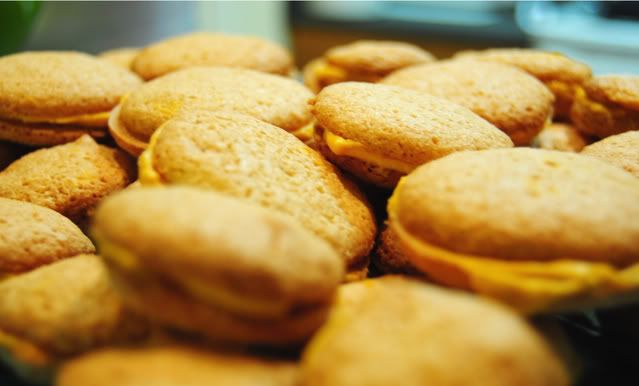
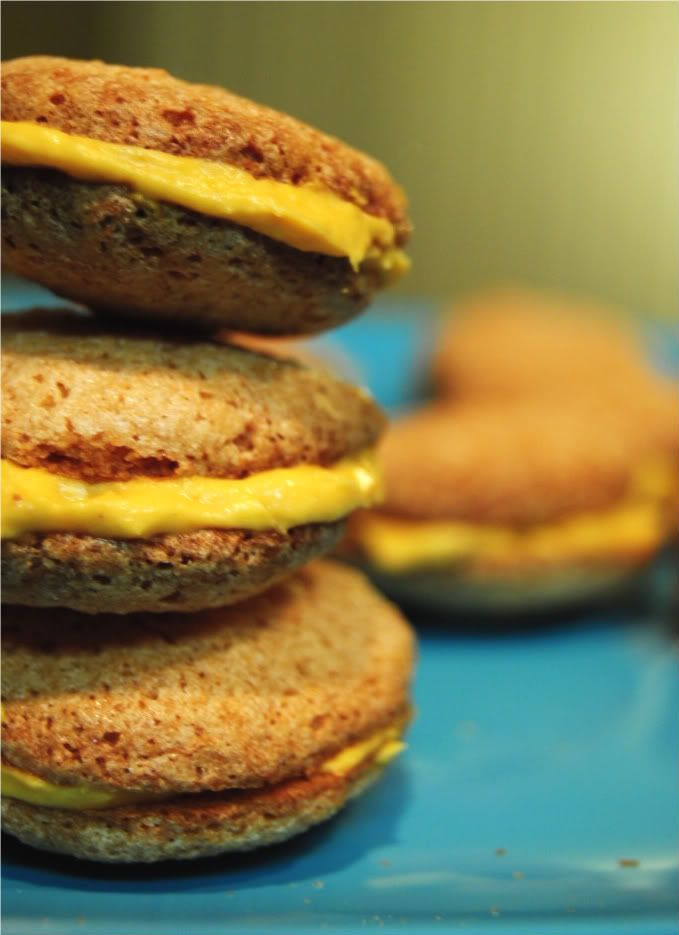
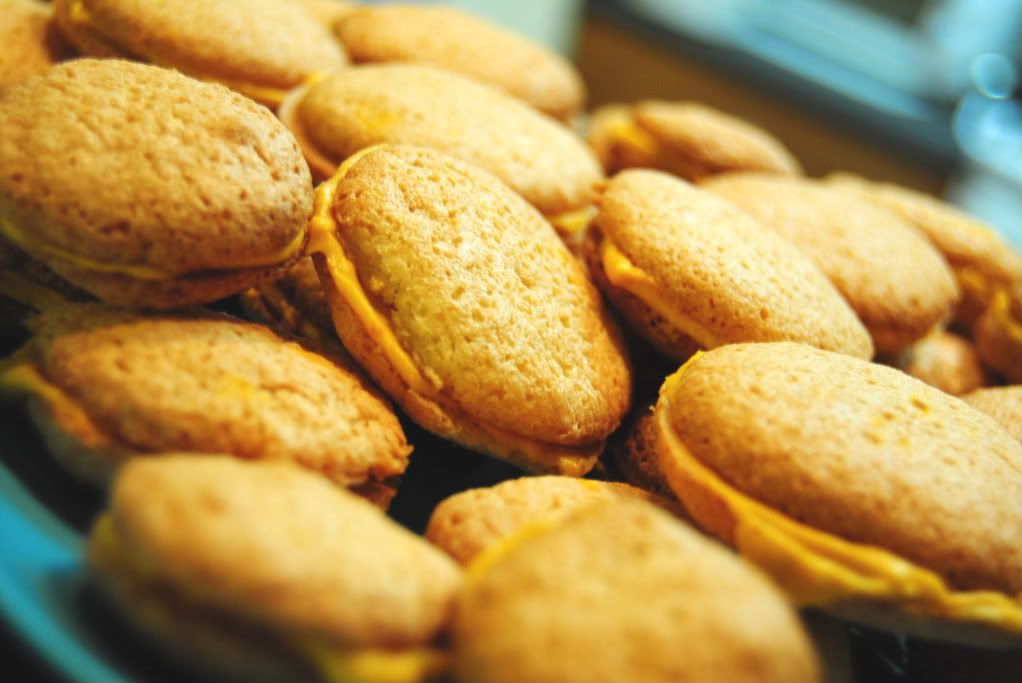
pumpkin spice macarons

Yes, I've jumped on the bandwagon. Macarons. They seem to be the new baking "thing."

I like this fad much better than the whole cupcake dealio from a while back. Macarons [not to be confused with macaroons] are a French, meringue-based sweet of some sort of filling sandwiched in between two airy, crunchy "cookies," made out of almond flour, egg whites, and sugar.


Got together with my good buddy, Tommy, to make these. He and Angie came by the apartment last night because Noosh and I hadn't seem them in a while. Tommy and I had been planning a bake-date for a while now, and finally settled on macarons.

Plus, being the pro bakers that we are, we have to maintain our street cred and keep up with trends. Word.


The recipe we used actually comes from make and bake, and is incidentally the Daring Baker's challenge recipe for this month [which I myself am not a part of yet, but hope to be soon!].

Pumpkin Spice Macarons

For the macarons, you'll need:
  • 2 1/4 cups confectioner's sugar
  • 2 cups almond flour
  • 2 tablespoons granulated sugar
  • 5 egg whites
  • 1 tsp vanilla

For the pumpkin filling, you'll need:
  • 4 oz pumpkin [canned or fresh]
  • 4 oz cream cheese, softened
  • 4 tbsps confectioner's sugar
  • pinch of nutmeg

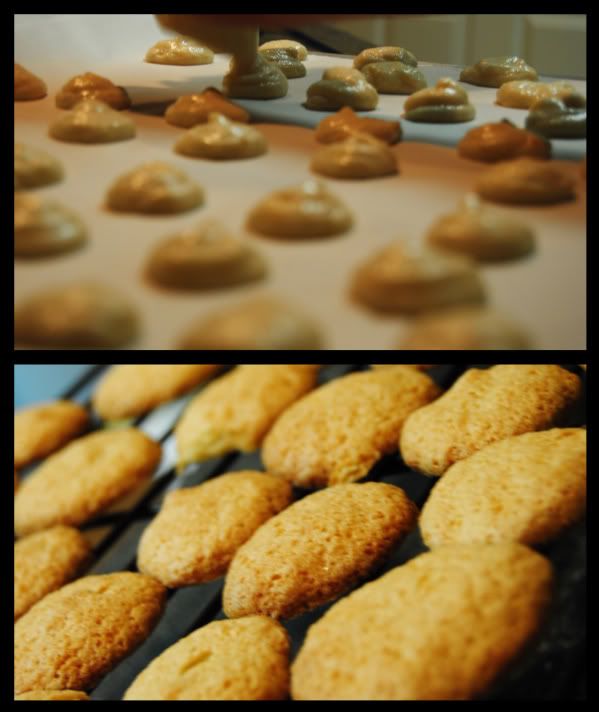
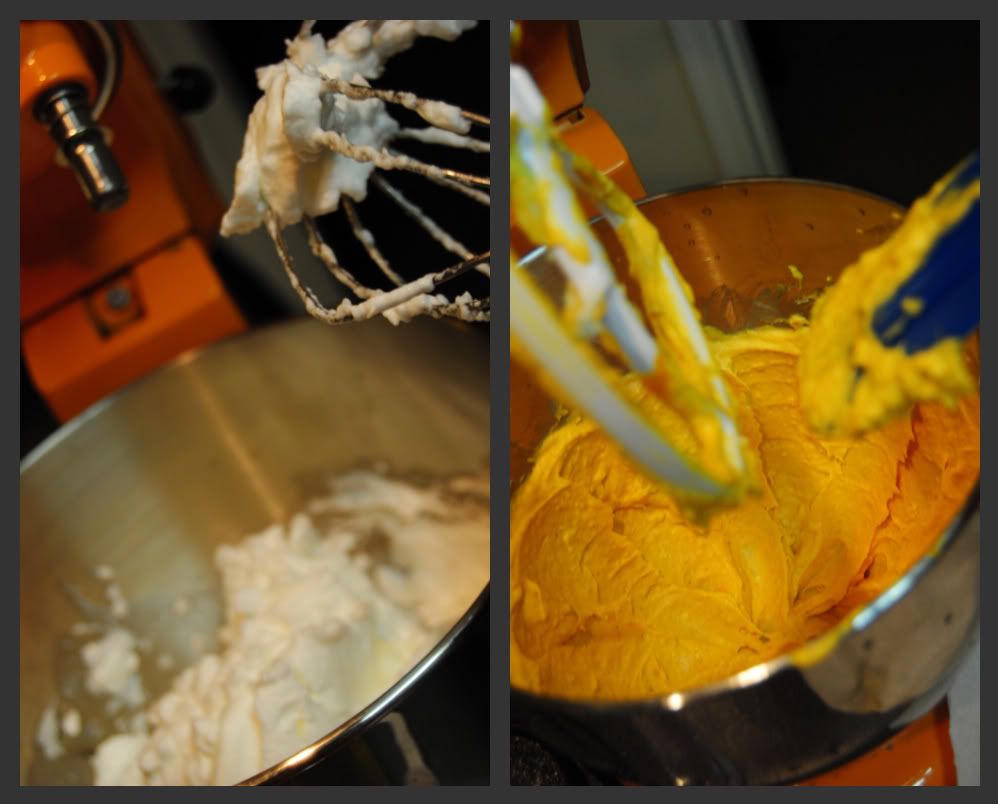
Preheat the oven to 350 degrees Fahrenheit. Line a large baking sheet with parchment paper. Combine confectioner's sugar and almond flour in a bowl until well-blended. In a clean, dry bowl attached to a stand mixer, whisk egg whites on medium until they form soft peaks. Slowly add granulated sugar and beat until stiff peaks form. Add 1/3 of almond mixture to egg whites and gently fold. Add in vanilla. Fold in remainder of almond mixture in two batches, being careful not to deflate the egg whites.

Gently pour batter into a piping bag fitted with a plain, half-inch tip. If there isn't one on hand, a ziplock bag with a small portion of the corner cut off will suffice. Pipe small disks, about 1-inch in diameter, on the baking sheet. Bake for 12-13 minutes, until top is slightly golden. Wait for them to cool slightly, 3-4 minutes, before removing disks and letting them cool on a wire cooling rack.

To prepare frosting, beat pumpkin, cream cheese, confectioner's sugar, and nutmeg in the bowl of an elecric mixer with the paddle attachment on medium-high until smooth and creamy. Once macarons have cooled, spread a layer of pumpkin on the flat side of one disc and use another disc of a similar size to sandwich the filling. Repeat until all macarons have been used up.


These actually tasted much better than I expected they would. I'm really iffy about meringue, because I feel like all I'm doing is eating fluffed up sugar. Which is not far from the truth, but also because purchasing supermarket meringue can just be one of the worst on-the-spot decisions you could make in a grocery store. But I think it's the pumpkin filling that is the star here; super creamy, not too sweet, and my first taste of pumpkin this Fall. Delicious.


Also delightful to serve because everyone loves how cute they are.

I'd say it was a total success. Excellent job, Tommy. We are definitely well on our way to pro status.


[I mean, I can always dream.]